Nobody likes interruption in the middle of something, especially while you are working on your computer. In that case, the automatic update feature can be an issue for you. Even those who have limited internet data, the automatic update feature on Windows 10 can be a problem. If you face this type of issue, you can pause the updates. The process is given below for you.
Through the PC setting app
This method can pause the automatic update for 35 days. Once the time is up, the update process will get started accordingly. You can quickly implement this method. Here’s the process that you need to follow:
1. Initially, click on the start menu and visit Settings.
2. From there, click on the Update and Security option and then Windows Update.
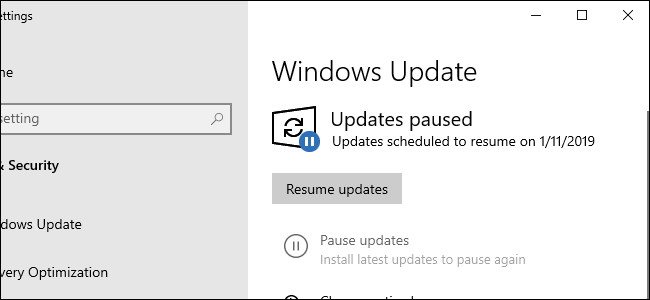
3. You will see the ‘Pause updates for 7 days’ option on the screen now. Click on it to pause the updates for a week.
4. To pause updates for 35 days, click on multiple times.
5. You can even set the date accordingly by going to the ‘Advanced Options’.
Turn on metered connection
If you desire to limit internet connectivity, then you need to access the ‘metered connection settings.’ Follow the below-given steps:
1. Through the start menu, visit ‘Settings’ section.
2. From there access ‘All Settings’ or click on the ‘Notifications’ icon.
3. Find the ‘Network and Internet’ option and click on it after finding. Then, click on the ‘Status’ option.
4. On the right side of the computer screen, you will be shown an active connection. Click on ‘Change connection properties.’
5. Search for the ‘Metered Connection’ option and enable the bar from there.
6. For resuming the update, disable the bar.
Through Command Prompt
Pausing the updates for a short interval is possible too. For that, you will have to access the ‘Command Prompt. Follow these steps:
1. Click on the ‘Start menu’ and then enter ‘cmd’ in the search section. You will see the ‘Command Prompt’ on the screen. Right-click over there and select ‘Run as Administrator.’
2. The admin access will be provided, and ‘Command Prompt’ will launch.
3. You need to enter these command now:
* “> net stop wuauserv”
* “> net stop bits”
* “> net stop dosvc”
4. In this way, automatic updates will be stopped easily.
5. For resuming the process, enter these commands:
* “> net start wuauserv”
* “> net start bits”
* “> net start dosvc”
6. Soon the update will start again on your computer.
Enable Flight Mode
If none of the methods are working for you, then you should consider this method. Though an active internet connection is necessary for using this method. The ‘Flight Mode’ on Windows 10 is capable of blocking the update. Follow these steps:
1. Go to the bottom right section on your PC and select Notifications from there. Then click the ‘Flight Mode’ option.
2. Your Wi-Fi connection will be disabled, and the Windows 10 update will be stopped as well.
Source url:- http://easy-mcafeecom-activate.com/2019/07/23/how-to-easily-pause-windows-10-updates/
Mike Smith is a creative person who has been writing blogs and articles about cyber security. He writes about the latest updates regarding mcafee.com/activate and how it can improve the work experience of users. His articles have been published in many popular e-magazines, blogs and websites.
